Creating sand footprints in Unreal Engine 4
gamedev ue4
I wanted to keep with the theme from my last post and do something with sand again. My rough goal was to use Unreal Engine 4’s (UE4) third person template and enable the character to leave footprints in the sand. I used this to look at blueprints, particle systems, materials and finally working with C++ in UE4. The “finished” project can be found on github, a link is included at the bottom of the post.
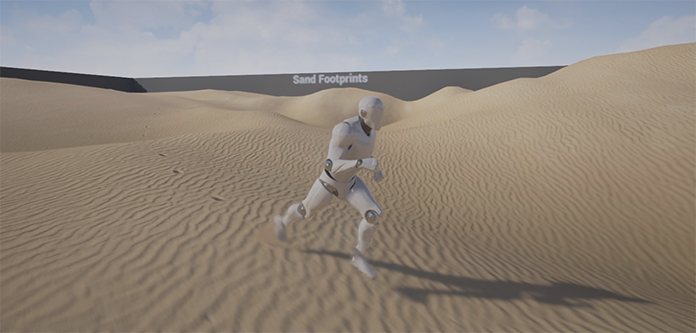
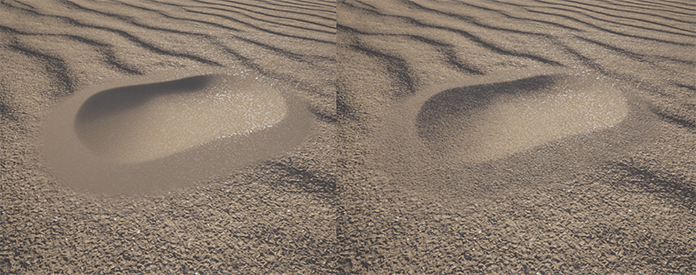
The final look of the terrain material and footprint effects
The first step when starting something new and unfamiliar is to always look for similar examples. While doing that I stumbled on this tutorial series by Kodi Myatt. It is a four part video tutorial about creating footprints in UE4, exactly what I need. The tutorial seems to be on hiatus at the moment, but the first video has quite enough information to get me started.
I found the best way to develop something in 3D space is to visualize every step of the way. But first we need to figure out when something has to be drawn. So let’s find a way to get a message on screen whenever the character’s feet touch the ground. This is actually quite simple in UE4. All we have to do is add a custom AnimNotify to the animation blueprint at the timestamps where a foot touches the ground.
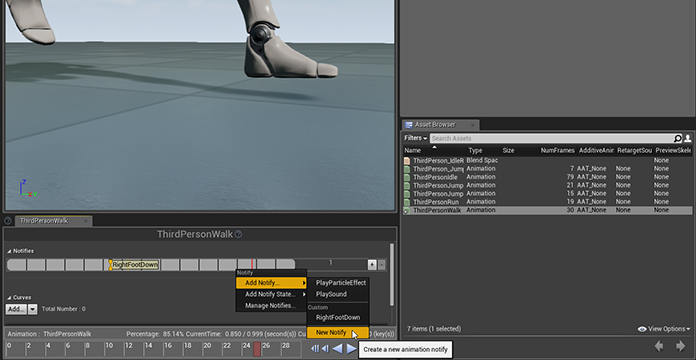
Adding custom AnimNotify to the third person character
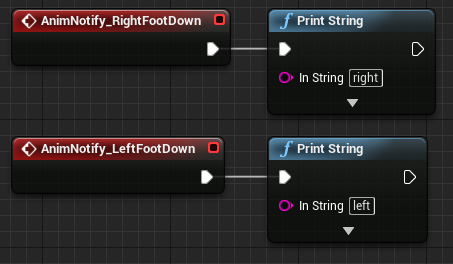
We can now use these notify events in the graph of the animation blueprint to do something. For now we’ll print the string “left” and “right” based on which foot hit the ground to see if it works.
I made progress with my own footprints by using a ray shoot, or rather line trace as UE4 calls it. I am able to figure out where on the terrain a foot “hit” the ground. I then spawn a decal actor using the floors orientation at that point to display any texture I want.
Instead of printing a message we will shoot a ray from the foot’s position downward to find out where on our terrain we have to draw a footprint. This ray shoot or rather line trace as it is called in UE4 also returns the surface normal of where we hit the ground. Using the normal and location we can position a decal actor and orient it to match the floor. All that is left now is to create the actual decal to look like a footprint. Let’s dust off Blender and try to create a footprint.

Blender footprint model
This looks good enough for now I think, a bit too artificial for my taste but we can always come back later and change it.
Back in UE4 we create a new deferred decal material and use the baked normal and displacement maps from blender to achieve a sense of depth.

Decal on default grey floor
The decal seems to work on the grey flat floor, but what about actual sand terrain? Let’s dive a little deeper into the material editor and create a desert material for testing purposes. We can use some of the assets from Epic’s vehicle example which already has good quality sand textures.
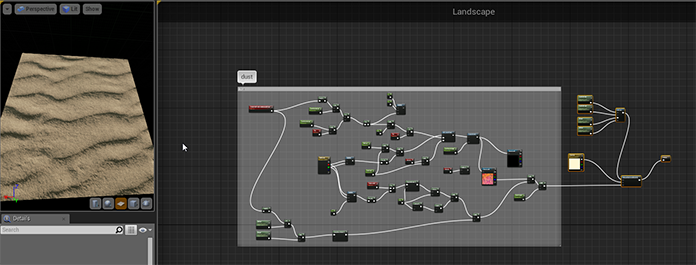
Sand material graph
The decal looks too smooth on this new terrain, we have to add some sand grains to it as well so it will blend in a little better with the rest of the terrain.
 A big problem when using this decal method is overlapping footprints. It looks really fake when this happens. It might be possible to mitigate the effect through some blending technique, however a more interesting approach might be to use an additional height map. The game Journey has a great sand simulation where you can slide down hills and leave a trail behind. They used additional detail height maps that reacted to players foot prints on top of the terrain (source). I guess tessellation for certain ground types like sand and snow might in fact be the ideal solution and I definitely want to come back to this topic at some point in time.
We still have a problem: our decals never go away. It would be great if the decals could handle their lifetime themselves and get deleted automatically. We can do this by creating a new blueprint that inherits from DecalActor. In the graph of this blueprint we define a life time and fade out time. Using these values we can then slowly fade out the actor before removing it completely. The fade out works by manipulating a fade parameter in the decal material.
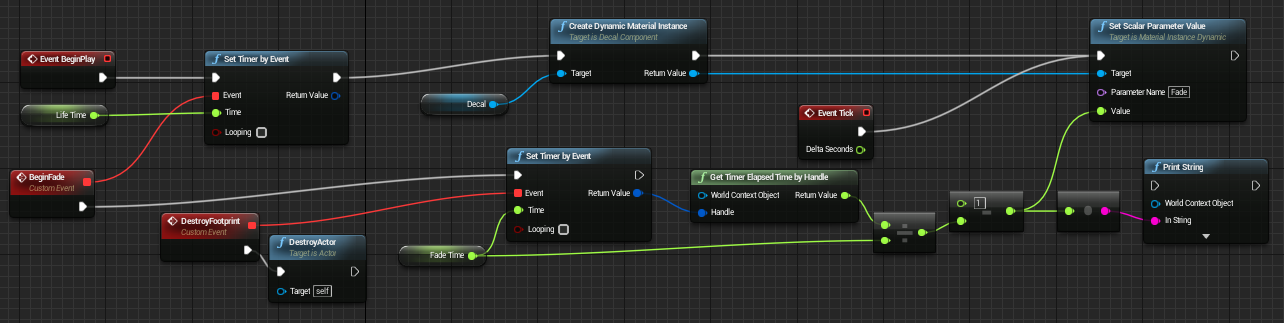
Custom DecalActor that fades out after a while
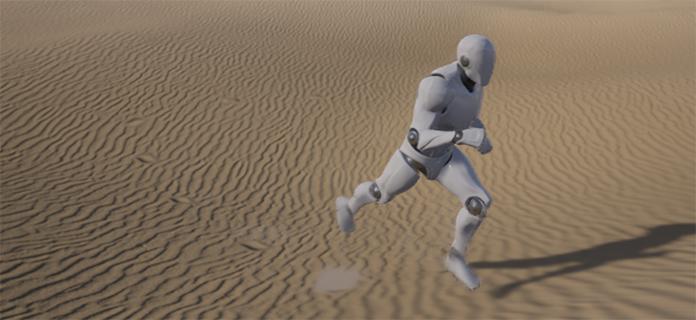
Finally I want to add a little sand kick up effect whenever a foot touches the ground. This is a job for a particle system. We can create a new particle system by right clicking in the content browser. Double clicking the effect opens up Cascade, which is UE4’s particle system editor. The UI looks a bit overwhelming at first, but it is actually laid out quite logically. Basically we can stack multiple emitters on top of each other in the emitters window. Each emitter has a range of different modules that can be added or removed, such as lifetime, velocity control or acceleration. These modules can further be controlled by editing them in the details panel or use an animation curve to control their values.

Simple sand kick up effect using Cascade
Let’s see the effect in action by adding it to our decal spawning blueprint.
It is working, but the color doesn’t match the terrain at the moment. This is because I used height based coloring for the terrain to give the sand some variety in color. We have to apply the same coloring system to our particle effect material. This is a great excuse to use material property collections. These collections are just what the name suggest, a collection of properties for a material, like our height color values. We can then use these collections inside our materials and only have to change the values in one place to affect them all.

Material property collection
The blueprint prototype is working properly, everything looks good, we can now go ahead and port some of the functionality to C++. This might not really be necessary in this case but the point is to get a feel for the workflow for future projects.
We start by adding a foot down function to our third person character which will get called instead of our current blueprint function.
protected:
    void Trace(FHitResult& OutHit, const FVector& Location) const;

public:
    UFUNCTION(BlueprintCallable, Category = "Character")
    void FootDown(const UArrowComponent* FootArrow) const;
Then, in the implementation of the functions, we’re going to just display the surface normal to get something on screen again.
void AFootprintsCharacter::Trace(FHitResult& OutHit, const FVector& Location) const
{
    FVector Start = Location;
    FVector End = Location;

    Start.Z += 20.0f;
    End.Z -= 20.0f;

    //Re-initialize hit info
    OutHit = FHitResult(ForceInit);

    FCollisionQueryParams TraceParams(FName(TEXT("Footprint trace")), true, this);
    TraceParams.bReturnPhysicalMaterial = true;

    GetWorld()->LineTraceSingleByChannel(OutHit, Start, End, ECC_Visibility, TraceParams);
}

void AFootprintsCharacter::FootDown(const UArrowComponent* FootArrow) const
{
    FHitResult HitResult;
    FVector FootWorldPosition = FootArrow->GetComponentTransform().GetLocation();

    Trace(HitResult, FootWorldPosition);

    // Debug vis
    DrawDebugLine(GetWorld(), HitResult.Location, HitResult.Location + HitResult.Normal * 100.0f, FColor::Blue, false, 10.0f, 0, 5.0f);
}

Result of the code above
The basics seem to be working again so all that is left is to spawn our decal and particle effect. Let’s go a bit further than the blueprint version however, how about we spawn a different effect based on the ground type that we hit? We can create a custom data asset to hold our effect references per surface type. To determine surface type we use the Physical Material present on a material.

Custom data asset for defining footprint effects based on ground type
Using this data asset we are now able to query the current physical material of the ground and select the correct decal and particle effect to display. All we need to do to support a new ground type is to create a specific effect and add it to the list.
Updated FootDown function:
void AFootprintsCharacter::FootDown(const UArrowComponent* FootArrow) const
{
    FHitResult HitResult;
    FVector FootWorldPosition = FootArrow->GetComponentTransform().GetLocation();
    FVector Forward = FootArrow->GetForwardVector();

    Trace(HitResult, FootWorldPosition);
    UPhysicalMaterial* PhysMat = HitResult.PhysMaterial.Get();

    // Retrieve the particle system and decal object to spawn for our current ground type
    UParticleSystem* ParticleFX = FootprintTypes->GetFootprintFX(PhysMat);
    TSubclassOf<ADecalActor> Decal = FootprintTypes->GetFootprintDecal(PhysMat);

    // Create a rotator using the landscape normal and our foot forward vectors
    // Note that we use the function ZX to enforce the normal direction (Z)
    FQuat floorRot = FRotationMatrix::MakeFromZX(HitResult.Normal, Forward).ToQuat();
    FQuat offsetRot(FRotator(0.0f, -90.0f, 0.0f));
    FRotator Rotation = (floorRot * offsetRot).Rotator();

    // Spawn decal and particle emitter
    if(Decal)
        AActor* DecalInstance = GetWorld()->SpawnActor(Decal, &HitResult.Location, &Rotation);
    if(ParticleFX)
        UGameplayStatics::SpawnEmitterAtLocation(GetWorld(), ParticleFX, HitResult.Location);
}
Of course if you’d like to see the rest of the source code or try the project for yourself you can get everything on github:
Video of the finished project